

If you are building a WordPress website with Elementor and have a section containing multiple rows of content, you may not want to display everything at once. Showing too many items can make the page look crowded and increase the amount of content visitors need to scroll through.
A simple solution is to display the first row initially and hide the remaining content behind a “Load More” button.
In this tutorial, we’ll show you how to create this effect using Elementor, CSS, and a small amount of JavaScript — without needing an additional plugin.
What Will We Build?
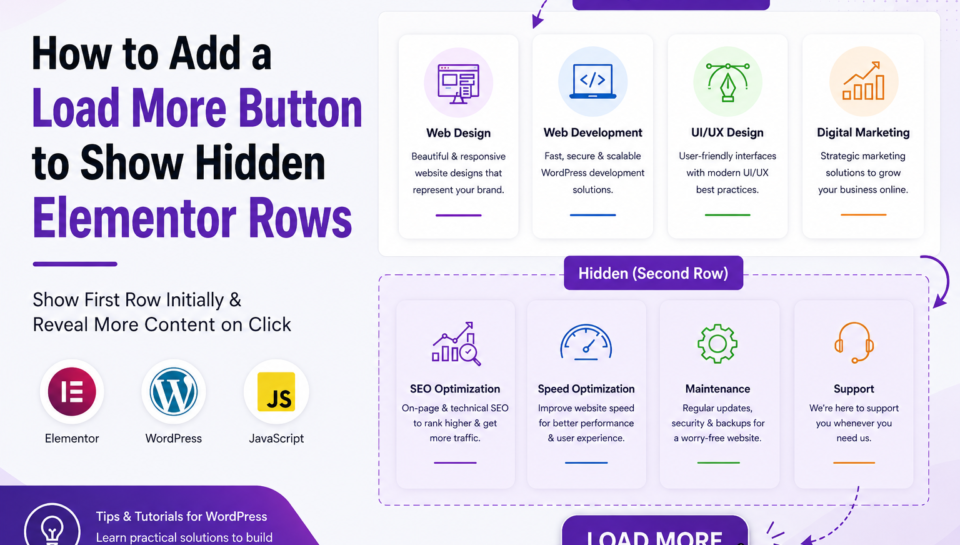
Suppose your Elementor section contains 8 items arranged in 2 rows, with 4 items in each row.
The final result will work like this:
- The first 4 items are visible when the page loads.
- The second row is initially hidden.
- A Load More button appears below the first row.
- When the visitor clicks the button, the second row becomes visible.
- The Load More button automatically disappears.
This approach is useful for service lists, portfolios, team members, product showcases, blog cards, features, and other Elementor layouts.
Step 1: Create Your Elementor Layout
First, create your normal Elementor section or container.
For example:
Parent Container
- Row 1
- Item 1
- Item 2
- Item 3
- Item 4
- Row 2
- Item 5
- Item 6
- Item 7
- Item 8
- Load More Button
The important part is that the second row should be inside its own container.
This makes it easy to hide and reveal the entire row with CSS and JavaScript.
Step 2: Add a CSS Class to the Second Row
Select the second row/container in Elementor.
Go to:
Advanced → CSS Classes
Add:
load-more-row
Do not add the dot (.) when entering the class name.
The second row should now have the class:
load-more-row
Step 3: Add a CSS Class to the Button
Select your Elementor Button widget.
Go to:
Advanced → CSS Classes
Add:
load-more-btn
Your button should therefore have:
load-more-btn
You can use any button text you want, such as:
Load More
Step 4: Hide the Second Row Initially
Now we need to hide the second row when the page loads.
Add the following CSS to your website:
.load-more-row {
    display: none;
}

.load-more-btn {
    cursor: pointer;
}
You can add this CSS through:
WordPress Dashboard → Appearance → Customize → Additional CSS
Or, depending on your Elementor setup, you can add it through Elementor’s Custom CSS functionality.
After adding the CSS, the second row will no longer be visible when the page initially loads.
Step 5: Add the Load More JavaScript
Next, we need to make the button reveal the hidden row.
Add an HTML widget underneath the Load More button and insert:
<script>
document.addEventListener('DOMContentLoaded', function () {

    const button = document.querySelector('.load-more-btn');
    const secondRow = document.querySelector('.load-more-row');

    if (!button || !secondRow) return;

    button.addEventListener('click', function () {
        secondRow.style.display = 'flex';
        button.style.display = 'none';
    });

});
</script>
The JavaScript finds:
.load-more-btn→ your Load More button.load-more-row→ your hidden second row
When the visitor clicks the button, JavaScript changes the second row from:
display: none;
to:
display: flex;
At the same time, the button is hidden.
Step 6: Test Your Elementor Load More Button
Now save your Elementor page and open the page on the frontend.
You should see:
Initially:
Item 1 | Item 2 | Item 3 | Item 4

          [ Load More ]
After clicking Load More:
Item 1 | Item 2 | Item 3 | Item 4

Item 5 | Item 6 | Item 7 | Item 8
The Load More button will disappear after the second row is revealed.
Why Use This Method?
Using CSS and JavaScript instead of another WordPress plugin has several advantages.
1. No Additional Plugin
You don’t need to install another plugin just to create a simple show/hide effect.
2. Lightweight
The solution uses only a small amount of CSS and JavaScript, so it can be much lighter than installing a dedicated Elementor addon.
3. Easy to Customize
You can modify the button, animation, spacing, and number of hidden rows according to your website design.
4. Better User Experience
Instead of displaying a large amount of content immediately, visitors can choose when they want to see more.
Optional: Add a Smooth Animation
If you want the second row to appear more smoothly, you can use a CSS animation.
For example:
.load-more-row {
    display: none;
}

.load-more-row.show-row {
    display: flex;
    animation: fadeInRow 0.5s ease;
}

@keyframes fadeInRow {
    from {
        opacity: 0;
        transform: translateY(15px);
    }

    to {
        opacity: 1;
        transform: translateY(0);
    }
}

.load-more-btn {
    cursor: pointer;
}
Then change the JavaScript to add the show-row class:
<script>
document.addEventListener('DOMContentLoaded', function () {

    const button = document.querySelector('.load-more-btn');
    const secondRow = document.querySelector('.load-more-row');

    if (!button || !secondRow) return;

    button.addEventListener('click', function () {
        secondRow.classList.add('show-row');
        button.style.display = 'none';
    });

});
</script>
This gives the hidden row a subtle fade-and-slide effect when it appears.
Common Elementor Issues
The second row is still visible
Make sure the class is correctly added:
load-more-row
Also check that you haven’t accidentally added the class to the wrong Elementor container.
The button doesn’t work
Check that the button has:
load-more-btn
Also make sure the JavaScript is placed inside an Elementor HTML widget.
The row appears but the layout is broken
Some Elementor layouts may use different display properties rather than flex.
If changing to:
display: flex;
causes a layout issue, inspect the original Elementor container’s display settings and adjust the JavaScript accordingly.
Final Result
With just Elementor + CSS + JavaScript, you can create a clean Load More experience without installing an additional plugin.
This technique is particularly useful for:
- Service sections
- Portfolio projects
- Team member sections
- Product showcases
- Blog cards
- Feature lists
- Testimonials
- Pricing/features
- Image galleries
If you are regularly building WordPress websites with Elementor, small custom solutions like this can help you create more flexible layouts while keeping your website lightweight.
Need Help With Your WordPress Website?
At Arsln Mak, we help businesses create professional WordPress websites with Elementor, custom layouts, responsive designs, performance optimization, and custom WordPress solutions.
Whether you need a new website, Elementor customization, WordPress bug fixing, or a custom feature, a tailored solution can often provide a better result than adding multiple plugins.
Arsln Mak — WordPress & Digital Solutions for Modern Businesses.